

South African Hiking Safety: A Practical Pre-Trip Guide
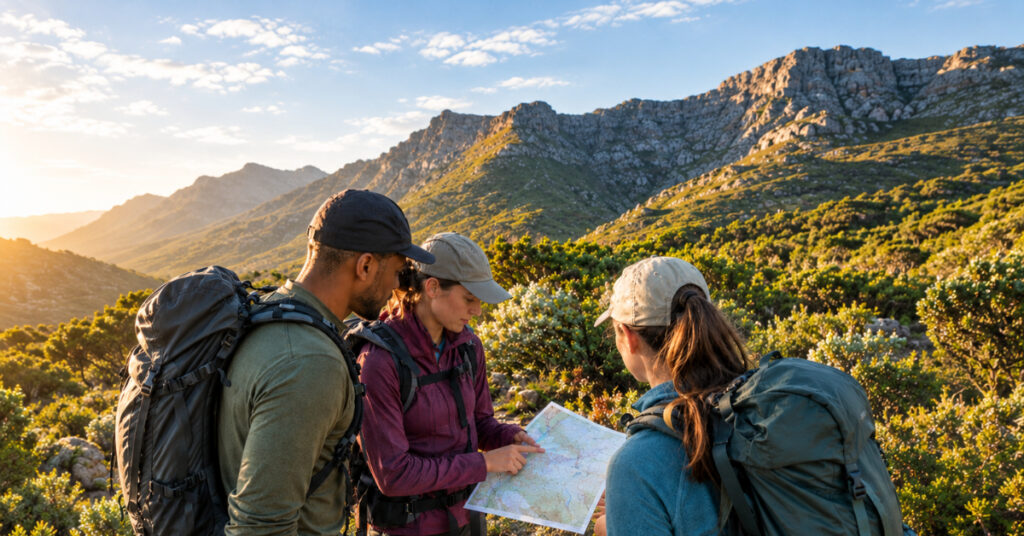
A safe hike starts before you reach the trailhead. South Africa’s hiking environments vary widely, from urban mountains and coastal paths to remote wilderness routes, so there is no single set of rules that applies to every trail.
The practical approach is to prepare for the hike you are actually doing: check the route and conditions, match the plan to your group, carry what the route requires, and communicate your plans.
This guide focuses on what to check, match, carry and communicate before a South African hike. It also explains what to consider if conditions change or something goes wrong.
No national guide can provide current conditions for every trail, so always check the park, reserve or trail authority’s latest information before setting out.
The specific rules, hazards and emergency arrangements can vary between parks, reserves and trails. Always follow the destination’s current instructions where they differ from general advice.
Table of Contents
The four-part pre-hike check
Before leaving, work through four questions:
Check: What are the route, weather, access arrangements and local conditions?
Match: Is the hike appropriate for everyone in the group?
Carry: Do you have the water, food, clothing, navigation and emergency equipment the route requires?
Communicate: Does someone know where you are going, and do you know how to obtain help if something goes wrong?
This simple framework is more useful than treating hiking safety as a fixed list of equipment or rules.
1. Check the route before you start
Research the actual route rather than relying on its name or a rough distance.
Check:
- distance and expected duration;
- elevation and terrain;
- route markings and navigation requirements;
- access points and gate times;
- permits or bookings;
- water availability;
- current closures or restrictions;
- possible escape or alternative routes where relevant.
The route should also be appropriate for the least experienced or least capable member of the group. Plan the pace around the whole group rather than expecting a less experienced or slower hiker to push beyond reasonable limits.
A short route is not necessarily an easy one. Terrain, exposure, heat, navigation and weather can all change the demands of a hike.
Check the destination’s own information
General hiking advice cannot replace local rules.
A park or reserve may have its own:
- permit requirements;
- opening hours;
- route restrictions;
- emergency contacts;
- group-size recommendations;
- wildlife precautions;
- weather-related closures;
- security notices.
These details can change, sometimes at short notice. Check the relevant official source immediately before departure rather than relying on an old route description or social-media post.
If the destination has closed a route or issued a warning, do not assume that the published route remains suitable.
2. Check the weather — and recent conditions
A forecast is part of route planning. South African Weather Service forecasts and warnings are useful starting points, but the forecast should be considered alongside the characteristics of the route and recent local conditions.
Before leaving, consider:
- forecast temperature;
- rain and thunderstorms;
- wind;
- visibility;
- official weather warnings;
- recent rainfall;
- current trail conditions;
- river or water-crossing conditions where relevant.
Mountain weather can change quickly, and conditions can be very different on the trail route from those at the trailhead.
Recent rainfall deserves particular attention on routes involving rivers, streams or steep wet terrain. Heavy rainfall can change river and trail conditions quickly, so check the destination’s current guidance before setting out.
There is no useful national rainfall or wind threshold that tells every hiker when to turn around. Follow the destination’s current guidance and assess the actual conditions.
If an official authority has closed a route, do not attempt to bypass the closure.
3. Match the hike to the whole group
Consider:
- hiking experience;
- fitness and expected pace;
- familiarity with the terrain;
- age and ability;
- relevant medication or personal requirements;
- whether everyone understands the route and plan.
The group should be able to complete the route without relying on anyone to push beyond their reasonable limits.
The specific recommendations differ between destinations. CapeNature advises against hiking alone, while Table Mountain National Park publishes its own group recommendation. These should be treated as destination guidance rather than a universal national group-size rule.
The practical lesson is straightforward: plan around the capability of the whole group and do not leave someone struggling to keep up.
4. Carry enough water and food
There is no single water quantity that applies to every South African hike.
Plan according to:
- duration;
- temperature and sun exposure;
- terrain and exertion;
- reliable water availability;
- likely delays;
- individual requirements.
Do not assume that water shown on a map will be available, safe to drink or accessible when you need it.
Food should cover the planned outing, with an allowance for an unexpected delay where the route or conditions warrant it.
Some destinations specify their own minimum water requirements. Where they do, follow those local requirements rather than applying a generic internet recommendation.
5. Dress for the conditions you may encounter
Conditions at the trailhead may not represent those higher on a mountain or later in the day. Carry clothing appropriate to the route and forecast, including protection from rain, wind, sun or cold where required.
Depending on the hike, this may include:
- suitable footwear;
- sun protection;
- a hat;
- rain protection;
- warm layers;
- spare or protective clothing on longer outings.
6. Have a navigation plan
Do not make your entire navigation plan dependent on a phone. Digital maps and GPS can be useful, but battery life, device failure and network availability can all become problems. Carry essential navigation and emergency information in a form that remains available if your phone fails.
Before leaving:
- understand the route;
- identify important junctions;
- download or carry the information you need;
- know where the route begins and ends;
- understand any obvious escape routes;
- carry an appropriate backup for the environment.
Stay on marked or established routes unless the destination specifically permits otherwise. Do not assume that an unmarked shortcut is safer or faster.
Navigation technology is an aid. Knowing where you are going remains the foundation of the plan.
7. Communicate your plans
Tell someone who is not on the hike where you are going and when you expect to return.
Depending on the route, give them:
- destination;
- planned route;
- group size;
- expected return time;
- relevant access information;
- local emergency or rescue information.
It is important to tell them if the plan changes. Giving someone outside the group accurate information about the route and expected return time creates a useful fallback if the group is overdue or fails to return as planned.
Some destinations also have sign-in or sign-out procedures. If the park, reserve or trail authority requires hikers to register or report back, follow that procedure.
For a remote hike, the person receiving your itinerary should know which authority or rescue service covers the area.
8. Do not assume you will have cellphone reception
Cellphone coverage varies considerably between hiking areas. SANParks notes that some parts of Table Mountain National Park have no reception, while CapeNature says many reserve areas have limited or no cellphone signal. Carry a charged phone but treat it as one part of the communications plan rather than a guarantee of help.
Before a remote hike, find out:
- whether the destination has known coverage limitations;
- which emergency or rescue service covers the area;
- whether the park or reserve publishes its own emergency contact;
- whether additional communications equipment is appropriate for the route.
Mountain rescue arrangements are regional rather than one single national hiking-rescue service. The Mountain Club of South Africa publishes regional rescue contacts for different parts of the country.
Check the relevant official contact information before each remote hike because emergency arrangements can change.
9. Check the hazards that actually apply to the route
Not every South African trail presents the same risks.
Depending on the destination, consider:
- extreme heat or cold;
- thunderstorms;
- steep or exposed terrain;
- loose rock;
- river crossings;
- flooding;
- tides;
- fire;
- wildlife;
- remoteness;
- security.
The point is not to assume that every hazard applies. It is to identify which ones could realistically affect this hike.
Coastal routes may require tide planning. Mountain routes may require particular attention to weather and exposure. Routes through reserves may have wildlife-specific rules. Urban-edge trails may have destination-specific security advice.
For example, SANParks publishes specific security guidance for Table Mountain National Park. That guidance should not automatically be treated as representative of every hiking destination in South Africa. Follow local signage and the instructions of the authority managing the trail.
10. Carry a practical emergency kit
The right equipment depends on the route and conditions.
For many day hikes, appropriate preparation may include:
- a first-aid kit;
- sufficient water and food;
- navigation information;
- a charged phone;
- a torch or headlamp;
- spare batteries or another suitable power option;
- weather protection;
- necessary medication;
- sun protection;
- a whistle where appropriate.
The aim is to carry what the route, conditions and foreseeable contingencies require.
11. Know when to change the plan
Good preparation includes deciding when not to continue.
Change the route, turn around or abandon the hike when conditions have moved beyond what the group can safely manage.
Possible warning signs include:
- worsening weather;
- loss of daylight;
- an unexpected injury;
- water running short;
- serious navigation uncertainty;
- a group member becoming unable to continue safely;
- substantially worse terrain or conditions than expected;
- an official closure or warning.
There is no universal turnaround time or weather threshold for every trail. The decision depends on the route, group, conditions and remaining options.
A turnaround is not a failed hike. It is part of managing the plan.
12. If someone becomes lost
The right response depends on the terrain, weather, daylight and circumstances, but avoid making the situation worse.
As general principles:
- keep the group together unless there is a clear reason not to;
- avoid unknown ravines, steep slopes or shortcuts;
- use available route and landmark information;
- consider retracing a known route only when conditions permit;
- seek help when appropriate;
- if movement has become more dangerous than remaining where you are, prioritise a safer position and communication rather than continuing blindly.
SANParks’ Table Mountain guidance advises lost hikers not to split up and warns against attempting unknown routes.
Do not treat “stay put” or “retrace your steps” as automatic rules. The safer choice depends on the circumstances.
13. If someone is injured
First consider whether the location is safe and whether moving the injured person is appropriate.
Then consider:
- the seriousness of the injury;
- whether the person can move safely;
- weather and daylight;
- whether assistance can be contacted;
- whether someone needs to remain with the injured person;
- the rescue procedure specified by the destination.
Rescue procedures can differ according to the destination, terrain, group size and circumstances. Follow the emergency procedure specified by the authority responsible for the area rather than assuming that one response applies everywhere. For a serious incident, use the appropriate emergency or rescue service for the area.
A pre-trip checklist is not a substitute for first-aid training.
14. Know the emergency arrangements for the destination
Do not rely on a generic emergency-number list copied from an old article.
Before the hike:
- Check the park, reserve or trail authority’s current emergency information.
- Identify the rescue or emergency service responsible for the area.
- Save the relevant contact details before leaving.
- Make sure the person holding your itinerary has the same information where appropriate.
The Mountain Club of South Africa maintains regional mountain-rescue contacts, while SANParks publishes park-specific emergency information for areas under its management.
Emergency information is maintenance-sensitive. Verify current numbers and procedures when planning the hike rather than assuming that an older article remains correct.
The practical pre-trip hiking checklist
Check
☐ Route, distance, terrain and expected duration checked.
☐ Access, permits, gate times and closures checked.
☐ Forecast, warnings and recent local conditions checked.
☐ Relevant hazards identified.
Match
☐ Route is suitable for the whole group.
☐ Expected pace is realistic.
☐ Everyone understands the route and contingency plan.
☐ Necessary personal medication or requirements are covered.
Carry
☐ Enough water and food for the route and likely delays.
☐ Suitable footwear and weather protection.
☐ Navigation information available without relying entirely on a phone.
☐ Charged phone and appropriate emergency equipment.
☐ Relevant local emergency/rescue contact saved.
Communicate
☐ Someone outside the group knows the destination and route.
☐ They know the expected return time.
☐ They know what to do if the group does not return as planned.
☐ Any destination sign-in/sign-out procedure has been followed.
The final check
Before setting off, ask:
If something goes wrong on this hike, do we have a realistic plan for dealing with it?
If the answer is no, fix the gap before leaving. That might mean changing the route, waiting for better weather, checking local information, adding appropriate equipment, bringing another experienced person or deciding not to go.
Good hiking safety is not about eliminating every possible risk. It is about understanding the route and conditions, preparing for foreseeable problems and making sensible decisions before a manageable problem becomes an emergency.
For South African hiking, the most useful rule is therefore simple:
Plan the hike you are actually doing, check the conditions before you leave, and be prepared to change the plan when those conditions change.
 Camping and Hiking Gear
 Climbing Gear
 Hunting and Tactical
 Leisure Gear
 Outdoor Accessories
 Outdoor Apparel
 Home
Home Shop
Shop Field Guide
 Account
 Wishlist
 Help Centre
 Contact Us